
I’ve worked with every application in the Microsoft 365 suite for the last couple of years, and Microsoft Lists is one app that has grown on me as I’ve found more and more ways to use the app. It’s easy to integrate lists into Teams channels and share them with others.
When a client of mine recently contacted me about moving a list from one team to another I said that I could fix it immediately, but as I started I found out it wasn’t as straightforward as I had initially thought.
In this article, we’ll show you how you can move a list from one team to another without getting rid of the content of the list. You can move lists freely between channels because the lists are linked to the Team and only displayed through the channels – but it’s different when moving between actual teams.
1. Import the List to Excel Then Create List From Excel Sheet
Microsoft Lists come with an export feature, which will export the data in your list to an Excel sheet or CSV file, depending on what you choose. The exported data can then be used to create a new list and populate it with the data from the old list.
This method requires a bit of manual input if you have a lot of custom-made columns in your list. As you might know, columns in Lists / SharePoint come with different functions, such as “people”, “choices”, “numbers”, etc. These functions dictate what type of data you can store within that specific column.
Excel does not have the same functions by default, which means the functions (column types) will be dropped from the columns when exported to Excel. The column types must then be reapplied manually in the new list. The data will be there, but the column might not display it correctly at first.
Without further ado, here are the steps to do it.
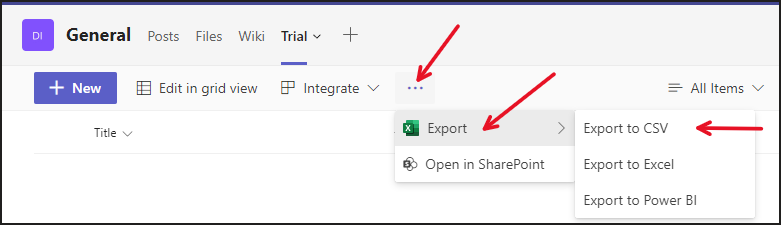
Step 1: Open the list in Teams/SharePoint or the Lists app.
Step 2: Press the three dots (If Export isn’t visible) then press Export and select to CSV.
Step 3: Go to the other Team and select the channel where you want to display the list. Press the + sign in the upper panel of that channel.

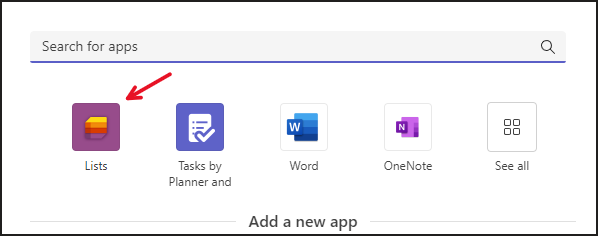
Step 4: Select Lists.
Step 5: Click Save.
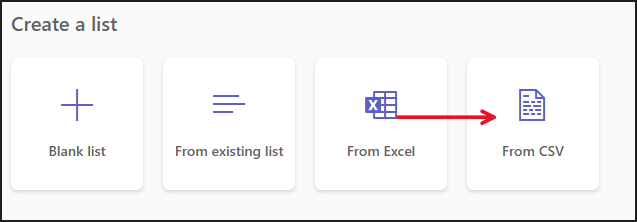
Step 6: Select Create a List.
Step 7: Select from CSV.
Step 8: Upload the file you exported earlier.
Step 9: Manually set the column types for each column.
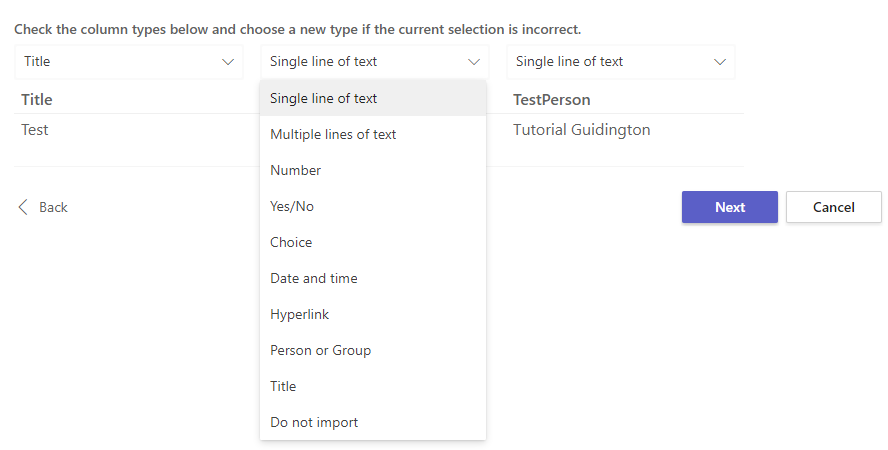
Step 10: Wait for the list to be created.
Now we need to fine-tune the list. Column types such as choices or persons must be adjusted one more time to make sure the data the row is populated with can retrieve settings such as information about the person or color of the choice, etc.
Now, the field contains information but it’s just plain text with no function connected to it.
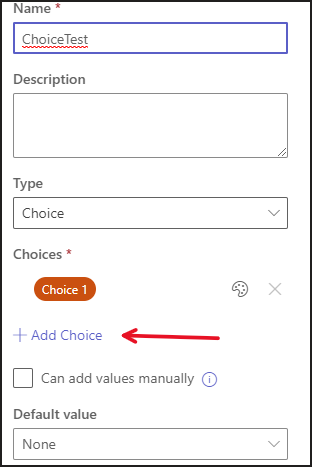
Step 11: Click the column then go to Column settings and select Edit.

Step 12: For choice columns, click Add choice to populate the column with choices.
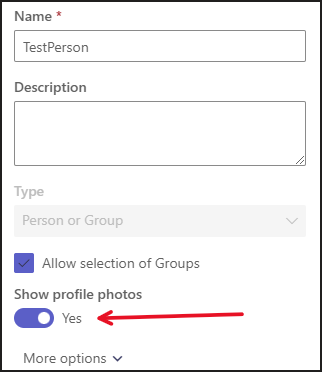
Step 13: If you’ve got a “Person or Groups” column that isn’t showing information about the person when you hover over it, you need to activate the column. I’ve found that editing the column and changing the Show profile photos setting then saving does the trick.
The name in the field should now be connected to a person. You might need to click out of the list and then re-open it.
Continue making the manual adjustments needed, if any. Now the list is located in the proper Team but make sure to keep the other list in the past Team until the new list is configured fully as you’ll want to backtrack to the other list to check how it was configured.
Once all changes are made, you can remove the old list without altering the new one.
Bonus:
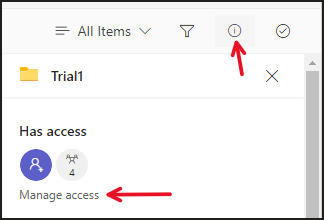
These lists don’t sync with one another. Meaning, if changes are made in one of the lists, the changes won’t appear in the other one. Therefore, it might be wise to restrict colleagues from working on the old list if you’ve decided to keep it. This can be done by managing access to the file from within lists.
Then set Members’ and Visitors’ access to Can View.
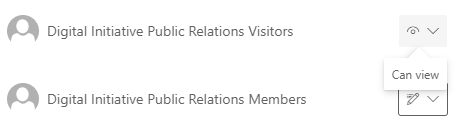
Group members and guests can’t edit the list now. This can be nice to have while you’re setting up the new list to make sure no information is added to the old list.
2. Create a List From an Existing One Then Move the Data Manually
You can create a list from an existing one, which will give you a brand new list using the same structure and formatting as the list you referenced during the creation stage. There will be no data in the list, but the data can be copied over.
Step 1: Go to the channel where you want to open the list.
Step 2: Click the plus sign in the panel.
Step 3: Select Lists.
Step 4: Click save if prompted to do so. Then select Create a list.
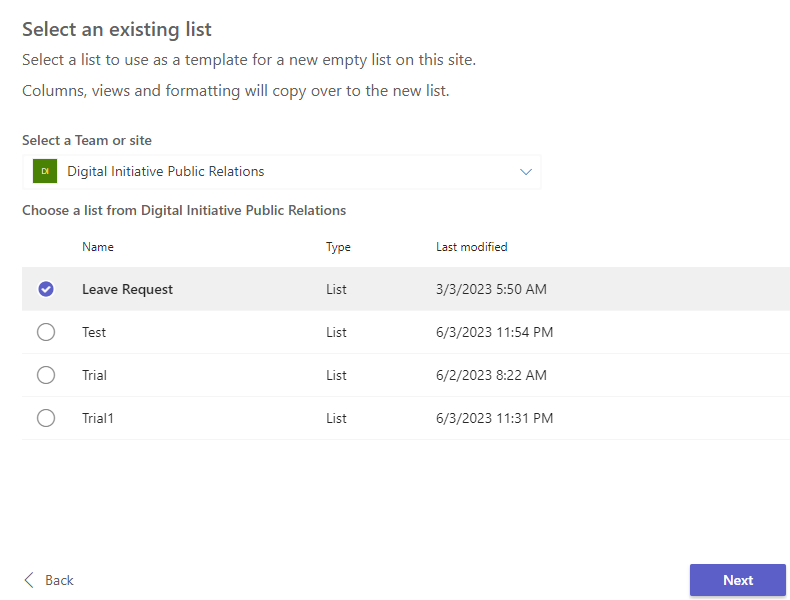
Step 5: Pick From existing list.
Step 6: Select the team where the list is stored, then pick the list you want to reference. Click Save.
Now it’s time to move the data from one list to the next.
Step 7: Open up the old list and click Edit in grid view. Select all entries by pressing the circle in the upper-left corner under the New button.
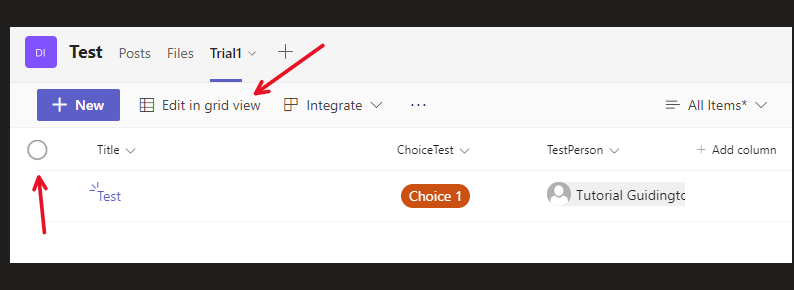
Step 8: Once they’re selected, press Ctrl + C to copy the data.
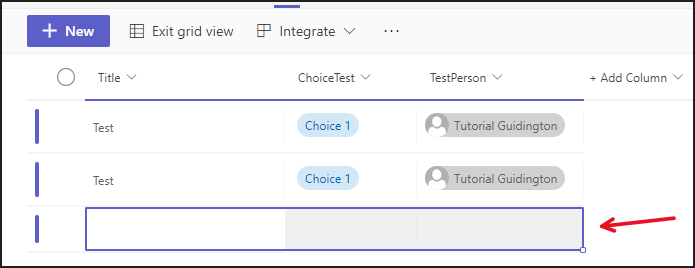
Step 9: Open up the new list and click Edit in grid view.
Step 10: Select the bottom row then press Ctrl + V to paste the data. Additional rows containing the copied data will now be added to the list.
Step 11: Make adjustments to the columns if needed. Otherwise, you’re done!
3. Create a Link To the List In Teams
Alternatively, you could create a link to the list and place it in the new team. This will display the list in the new team – but it will still be stored in the old team, which will be the owner of the list.
Step 1: Go to the new team and open up a channel.
Step 2: Click the plus sign.

Step 3: Select Lists.

Step 4: Click Save if prompted to do so then choose to add an already existing list.

Step 5: Go to Office.com and open the Lists app. From there, open the list you want to link and copy the URL.
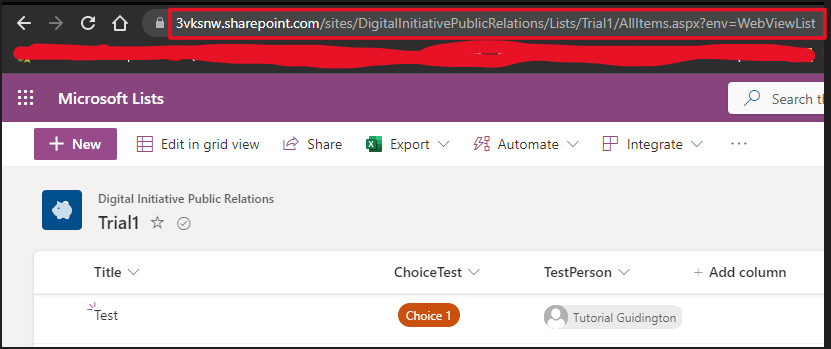
Step 6: Insert the link in the field then press the arrow.

Step 7: The new team will now have access to the list. Now both teams can make changes to the lists and they will be synchronized. However, if you were to remove the list from its original location, or if the team is removed, the list will also be removed from the new team as the link will work no more.
Make a Template of the List
You can also make list templates and then use those templates to create new lists in other teams. This is a way of moving a list from one team to another.
The only downside is that the actual content of the list isn’t included in the template, only the formatting, structure, colors, and columns. You will then have to move the information from one list to the subsequent one.
However, there are rather simple ways of transferring the information between the lists once the templates have been set up. You can use either the method shown in the step prior to this one or by creating simple Power Automate flows.
Not all tenants and SharePoint sites/Teams have templates activated. In that case, the function must be activated with PowerShell. Otherwise, you should be able to find the Save as a template function by going to list settings, which can be accessed by pressing the cog in the upper-right corner, next to your initials, in the list.
I do recommend one of the other methods we’ve discussed thus far unless you plan to use the list for multiple Teams. In that case, making a template might be useful. Regardless, I think you’ll achieve the results you’re after by creating lists based on the structure of another list.